
Appearance
Vendor
The Vendors module in AureusERP enables efficient management of your suppliers by storing critical business, contact, and financial information. Vendor creation follows a structure similar to customer creation, with dedicated fields tailored for vendor-specific operations.
Vendor Creation
Steps to Create a Vendor
Navigate to
Invoices → Vendors → Vendors.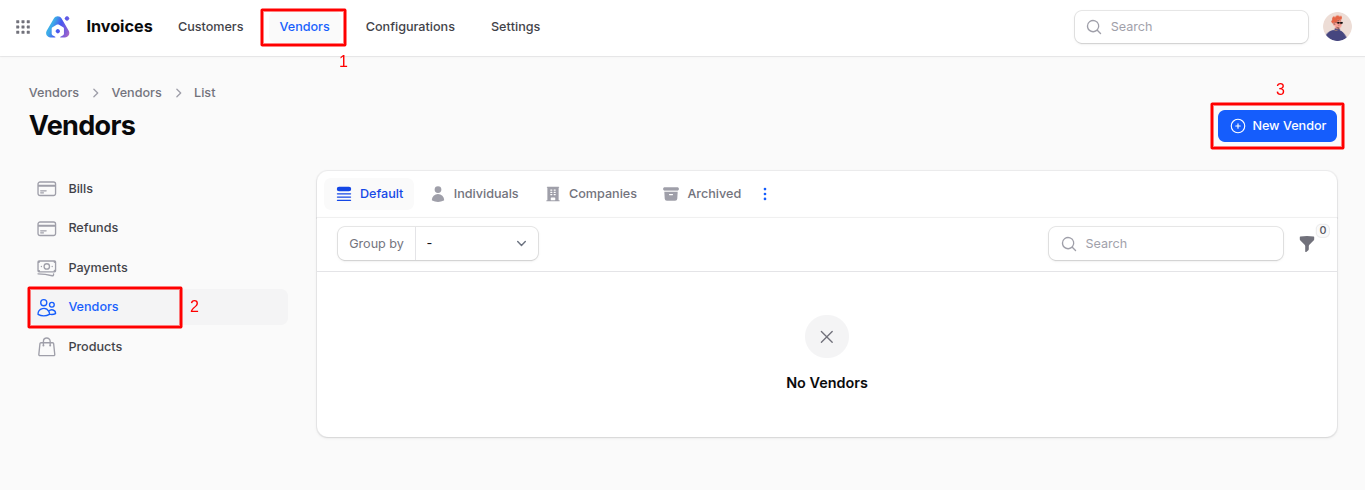
Fill out the form with the following details:
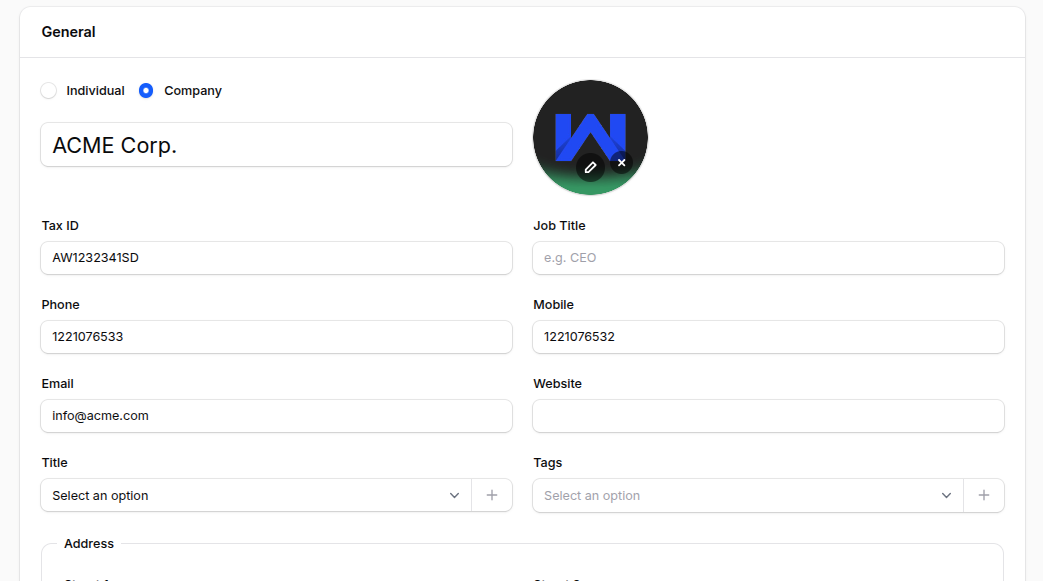
General Section
- Individual or Company: Identify whether the vendor is a person or a registered business. If a company is selected, the system assumes this is the primary organization, and the "Company" field becomes irrelevant.
- Name: The official name of the vendor or contact person.
- Company: Link this vendor to an existing company record in your system. Useful if the contact is part of a larger business group.
- Tax ID: The government-issued tax identification number. Essential for regulatory compliance and tax reporting.
- Job Title: Specifies the role of the individual in the vendor's organization.
- Phone / Mobile: Primary phone numbers for contacting the vendor.
- Email: Official email used for business communication and invoice exchange.
- Website: Vendor's web address, used for quick reference and validation.
- Title: Honorific or formal prefix (e.g., Mr., Ms., Dr.) for polite communication.
- Tags: Keywords or labels used to categorize the vendor for quick searching or reporting.
- Address: Complete address of the vendor including street, city, postal code, state, and country.
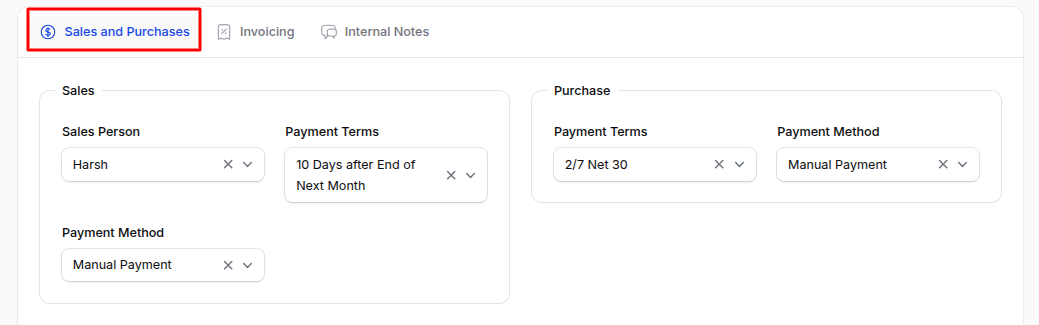
Sales and Purchase Section
Sales
- Sales Person: Assigns an internal team member who manages the relationship with this vendor.
- Payment Terms: Specifies how soon the vendor expects to receive payment (e.g., immediately, after 30 days).
- Payment Method: Defines the preferred method for the vendor to receive payments (e.g., bank transfer, cheque, cash).
Purchase
- Payment Terms: Sets default payment deadlines for bills issued by the vendor.
- Payment Method: Indicates how your organization intends to pay this vendor regularly.
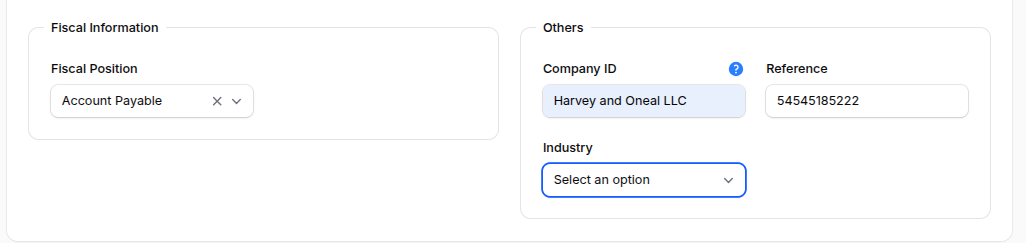
Fiscal Information
- Fiscal Position: Automatically maps taxes and accounts based on the vendor’s location, tax profile, or business rules. This simplifies tax computation and posting during transactions.
Others
- Company ID: Internal identifier for the vendor, useful for linking within systems or importing/exporting data.
- Reference: External or custom identifier for the vendor used for tracking or syncing with other systems.
- Industry: Categorizes the vendor based on the market or sector they operate in. Useful for analytics and reporting.
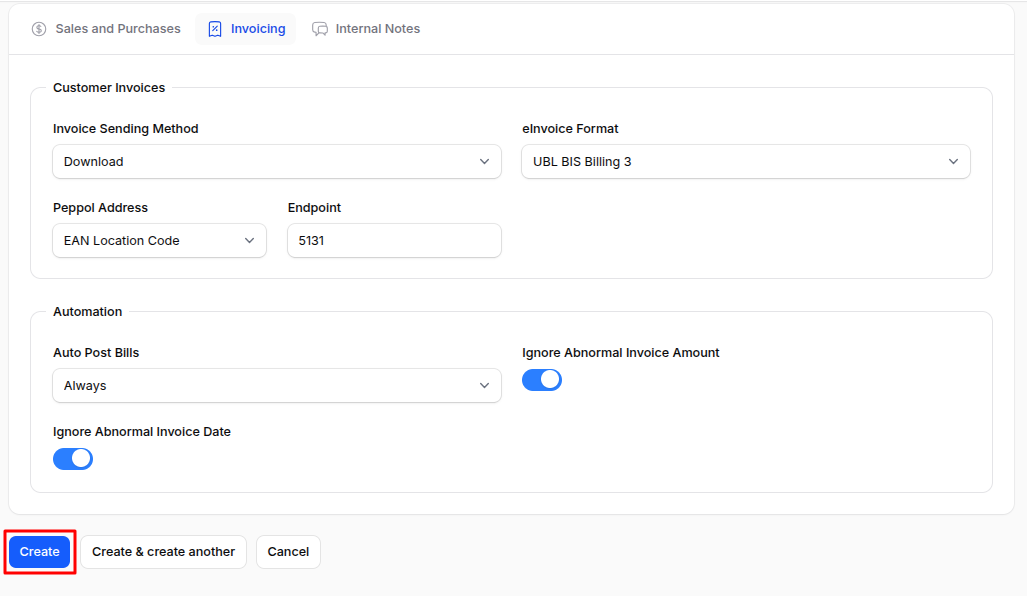
Invoicing Section
Customer Invoices
- Invoice Sending Method: Determines how invoices are exchanged—via download, email, or postal mail.
- eInvoice Format: Specifies the format of electronic invoices (if your country mandates or supports e-invoicing).
Automation
- Auto Post Bills: Controls whether the system should automatically post bills. Options:
- Always: Bills from this vendor are automatically validated and posted.
- Ask After 3 Validations Without Edit: Automatically posts if no changes are made after three validations.
- Never: Requires manual validation and posting.
- Ignore Abnormal Invoice Amount: Allows the system to skip warning prompts for unusually large or small invoice totals from this vendor.
- Ignore Abnormal Invoice Date: Lets the system bypass alerts when invoice dates appear irregular (e.g., far in the past or future).
- Auto Post Bills: Controls whether the system should automatically post bills. Options:
After Vendor Creation
Clicking Create saves the vendor record and redirects you to the View Partner page.This page provides a centralized overview of the customer's information and offers tools to manage contacts, addresses, and bank accounts.
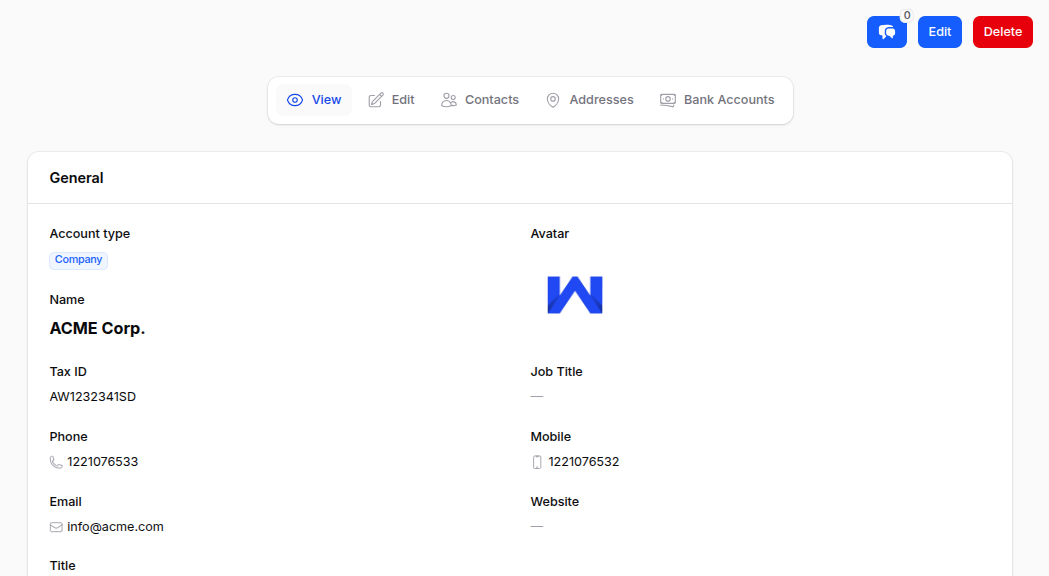
Edit Partner
Update the vendor’s personal, company, or fiscal details by clicking the Edit Partner button. Ideal for making corrections or updating records over time.
Contacts
- Click on the Contacts tab to open the Manage Contacts page.
- Use the Add Contact button to launch a modal form.
- This form replicates the vendor creation format, allowing you to:
- Add multiple points of contact for a vendor.
- Capture details like name, email, phone, title, etc.
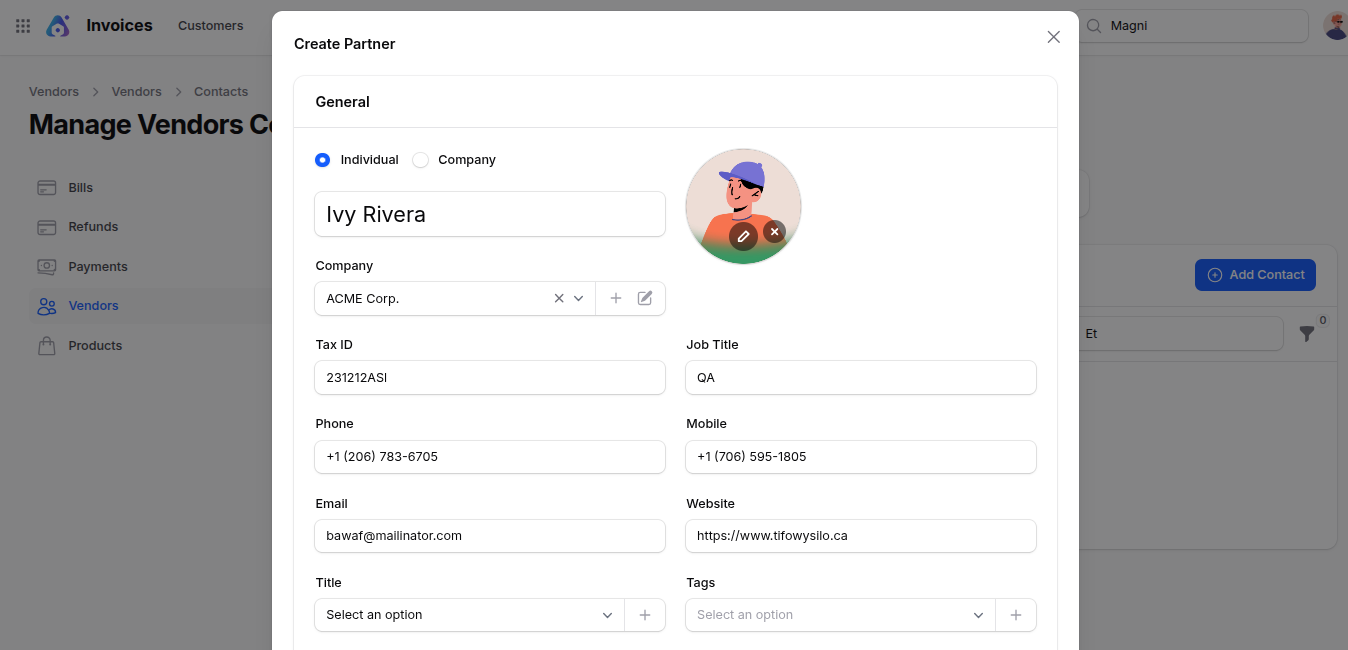
📌 Use Case: Helpful for organizations with multiple contact persons.
Address
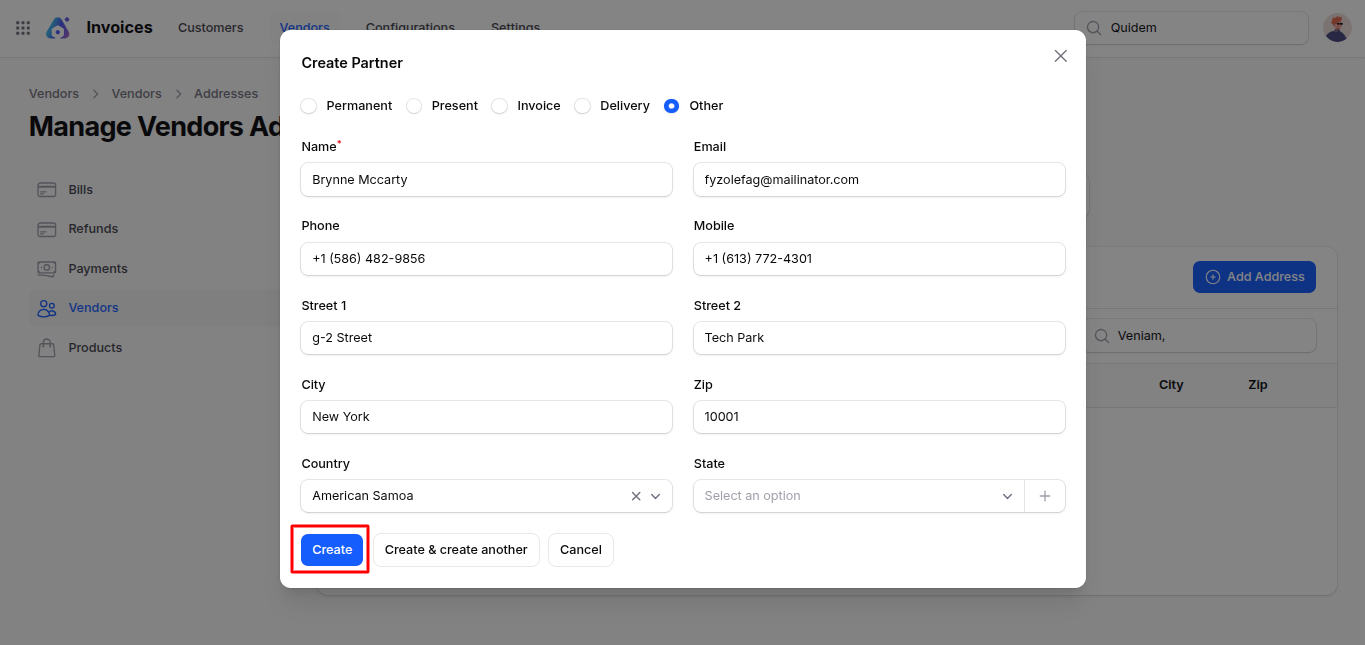
- Click the Address tab to navigate to the Manage Address page.
- Click Add Address to open a modal form with:
- Toggles: Define the type of address — Permanent, Present, Invoice, Delivery, or Other.
- Fields: Name, Email, Phone, Mobile, and full Address Details (Street, City, Zip Code, State, Country)
Bank Accounts
Navigate to the Bank Account section to manage financial details.
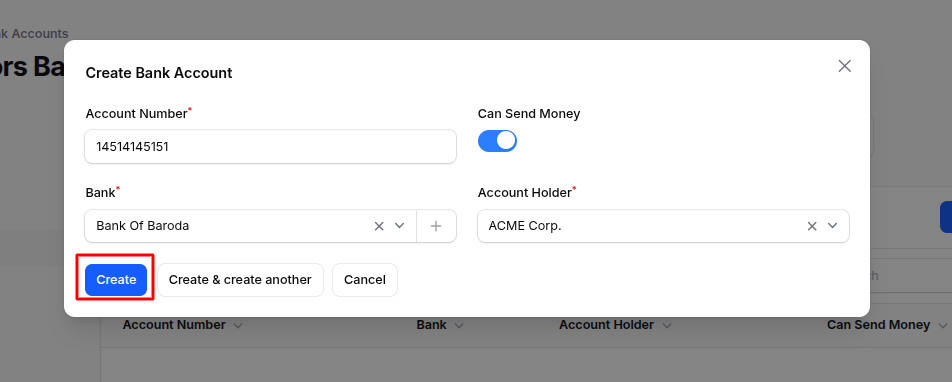
Click New Bank Account to open a modal form with the following fields:
- Account Number: Unique identifier of the vendor’s bank account.
- Can Send Money: Enable if this account can be used for outbound payments.
- Bank: Choose from existing banks or click ➕ to create a new one.
- Account Holder: Select the relevant vendor from the dropdown.
📌 Use Case: Manage multiple financial accounts for the vendor, control access, and define payment channels.