
Appearance
Time Off
The My Time section in the Time Off Plugin allows employees to manage their own leave requests, track time off balances, and request leave allocations. Below is a detailed guide on how to use each section effectively.
Dashboard
How to Access:
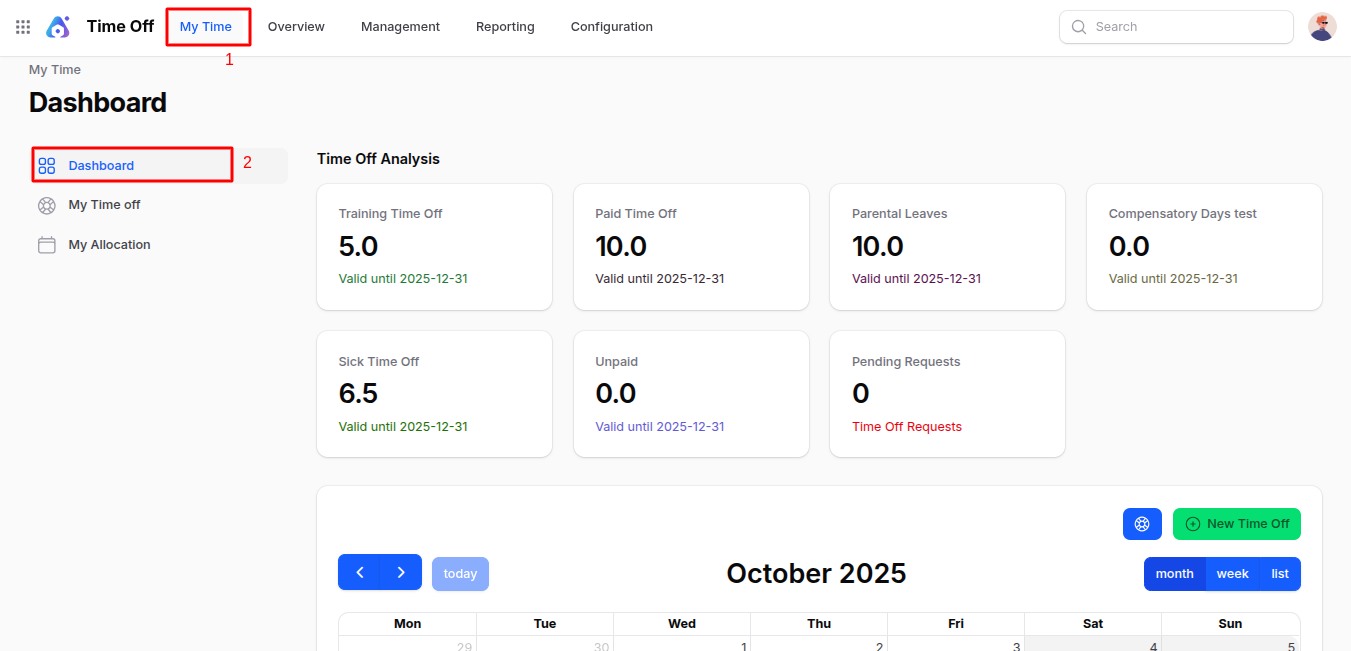
Navigate to Time Off -> My Time -> Dashboard.
Use Case:
The Dashboard offers a quick overview of your time off status. You can track your current leave balances, view pending leave requests, and access a calendar to visualize your leave history and future plans.
Features:
- Leave Balances: Shows how many days are available for each leave type (e.g., Sick Leave, Vacation).
- Pending Requests: Displays the count of your time off requests that are waiting for approval.
- Calendar View: Visual layout of your time off, public holidays, and scheduled leaves.
- New Time Off Button: Opens a form to create a new leave request.
Creating New Time Off:
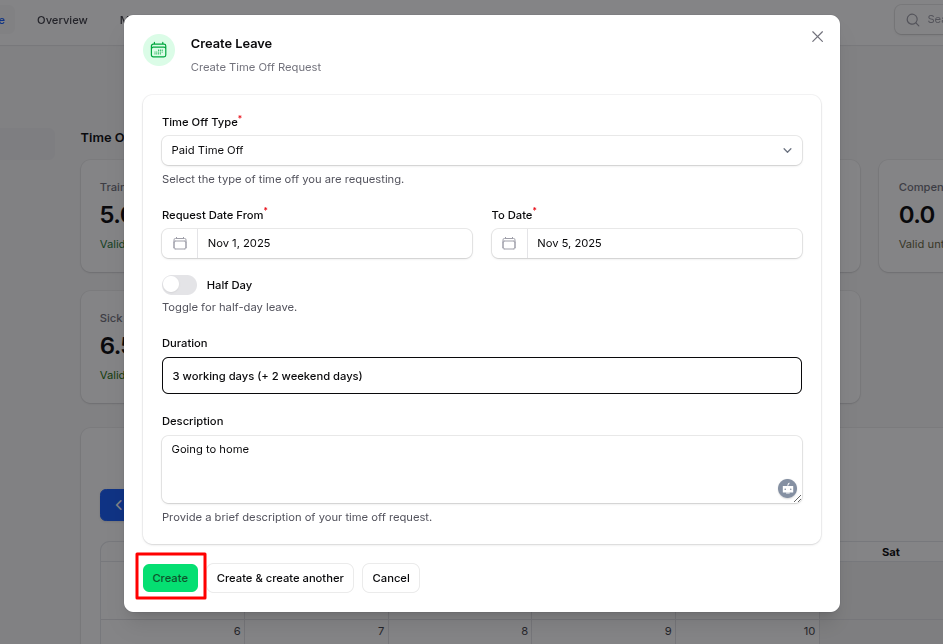
Click New Time Off, a modal appears with the following fields:
Time Off Type: Select the type of leave (e.g., Sick, Vacation).
Request Date From / To: Select the start and end dates for your leave.
Half Day (Toggle): Enable if the leave request is for a half-day.
Description: Add details or reason for the leave.
Action Buttons:
- Create: Submit the request.
- Create & Create Another: Submit and start a new request.
- Cancel: Close without saving.
Post Creation
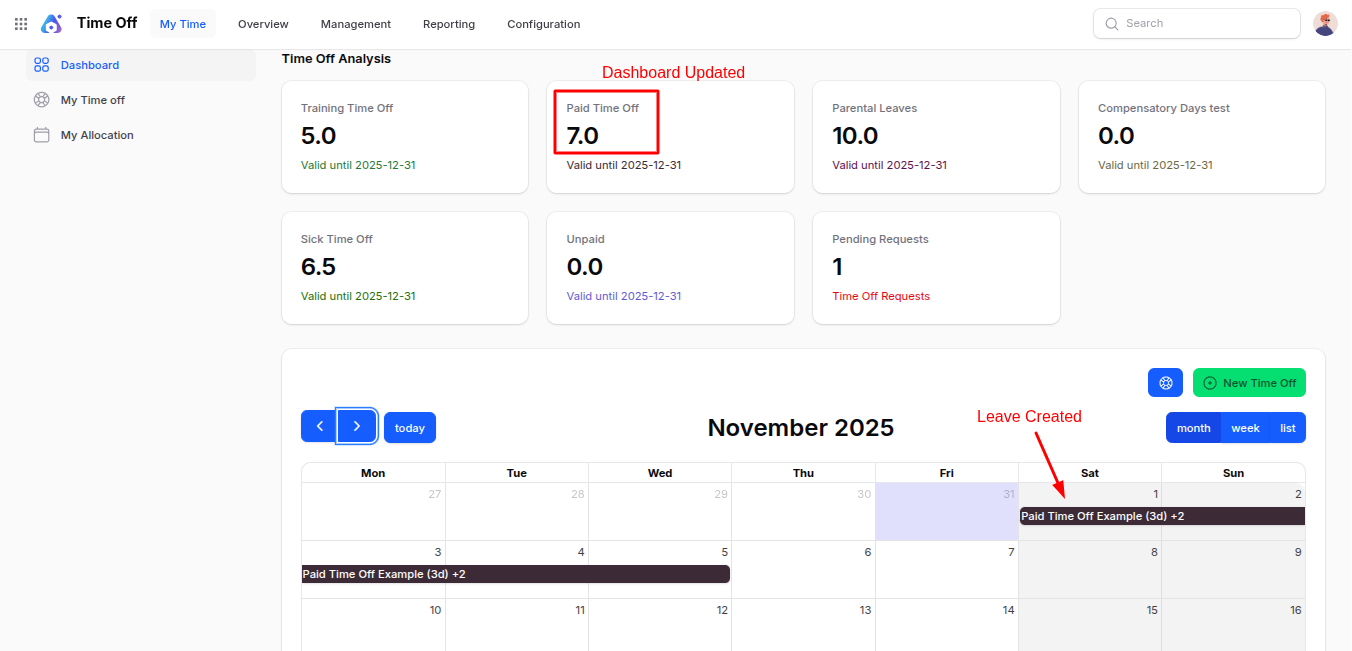
Note: You can also click directly on a date in the calendar to open the leave request modal with the date pre-filled.
My Time Off
This section is for creating and tracking personal leave requests. Employees can request different types of time off and attach supporting documents if required.
Steps to Create Request Time Off:
Navigate to
Time Off -> My Time -> My Time Offas shown in the below image.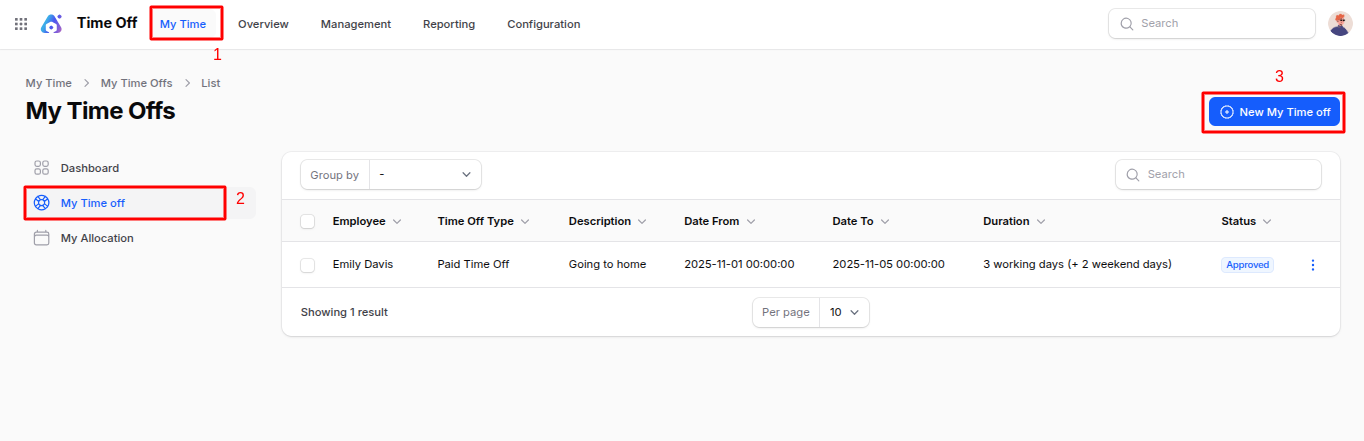
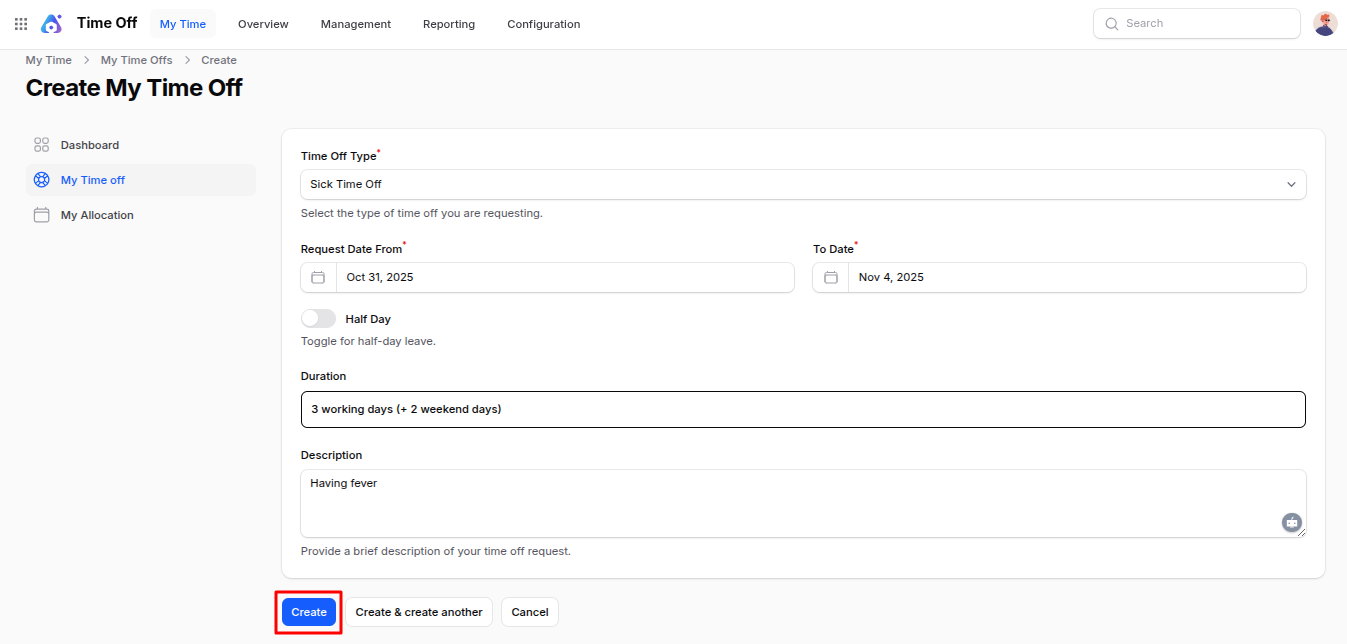
Click New My Time Off, a modal appears with:
- Time Off Type: Choose the category of leave.
- Request Date From / To: Set the leave period.
- Half Day (Toggle): Enable for half-day leave.
- Description: Describe the reason for time off.
- Attachment: Upload supporting documents like medical certificates or approvals.
Action Buttons:
- Create: Submit the request.
- Create & Create Another: Submit and start another request.
- Cancel: Exit without saving.
My Allocation
Use this section to request or view allocated time off. This is helpful when leave types require prior allocation (e.g., Earned Leave).
Steps to Create Request Allocation:
Navigate to
Time Off -> My Time -> My Allocationas shown in the below image.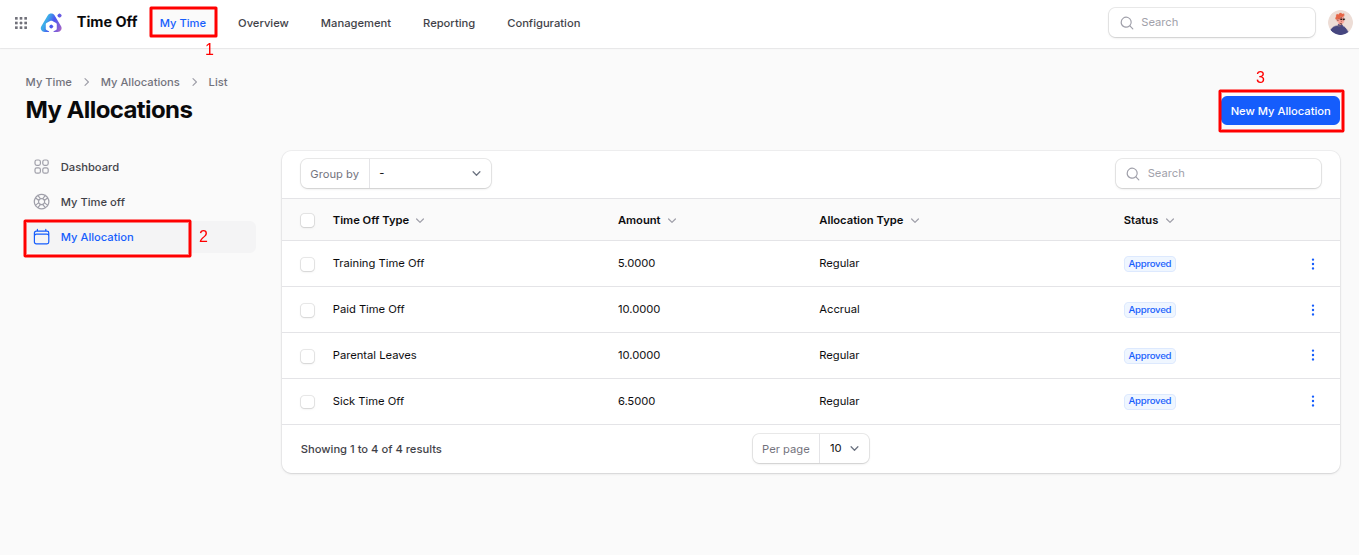
Click New My Allocation, a form appears:
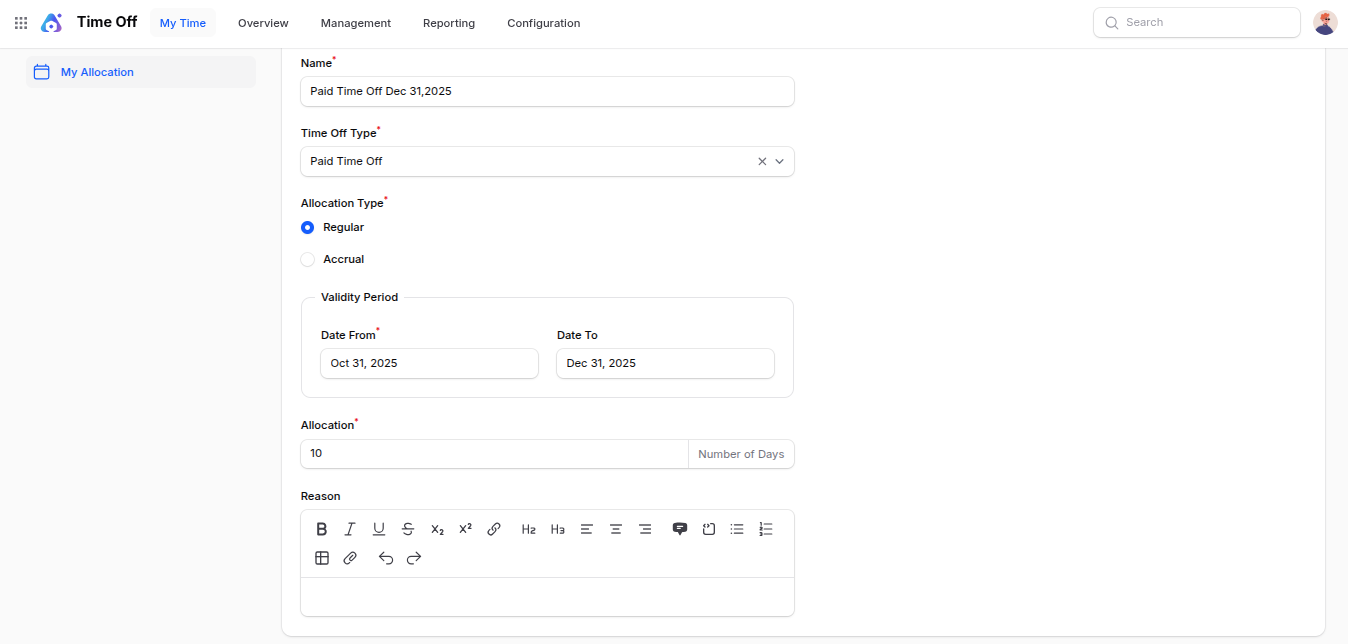
- Name: Title or description of the allocation request.
- Time Off Type: Select the leave category.
- Allocation Type:
- Regular: Standard leave allocation.
- Accrual: Leave accumulates over time based on policies.
- Validity Period:
- Date From / To: Set the period for which the allocation is valid.
- Allocation (No. of Days): Number of leave days being requested.
- Reason: Justification for the allocation request.
Action Buttons:
- Create: Submit the allocation request.
- Create & Create Another: Submit and begin a new request.
- Cancel: Exit without saving.
Summary
The My Time section centralizes all personal time off activities. It helps employees efficiently manage their leave requests, allocations, and maintain a clear overview of their time off balances. Utilizing this feature ensures transparency, compliance, and smooth HR operations.